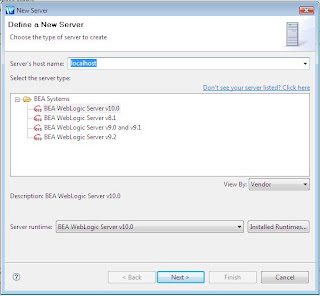
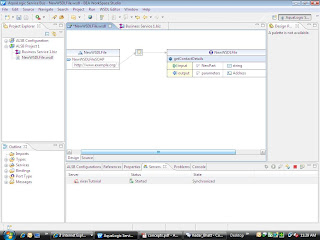
Hope you have ceated the local server instance and after starting the server you are able to view the ALSB console at http://localhost:7001/sbconsole as per my last post. For my example, today I have created seperate server instance at port 7041, but you can always use the good old 7001 port which we created last time. Now, let's start with our example.
First find out the BPEL Service WSDL URL handy, do test it before you end up choosing the same. For my example I've selected, the well-known "Hello World" BPEL Service. The URL for my BPEL service is http://WWW-XYYZZZ.corp.ABC.CO:8888/orabpel/default/Helloworld/1.0?WSDL.
Start the server from WorkSpace Studio. Open the ASLB console in the browser and login. Ont he left hand side-bar you will find the "Change Center" as shown below.
Click on "Create" to activate your session. Basically, the Change Center allows for team collaboration when services and metadata are being configured in ALSB. Each user works in a sandbox session until the user is ready to check in the working configuration to the core configuration of the bus. The change center provides multiple levels of undo, and visibility into conflicts, as multiple users work on the configuration.
Now, we are ready to do the changes. click on the "Project Explorer" from the links available right below the Change Center.
You may need to scroll down to view this "Project Explorer" link. On the right hand, you will get option to create the folder.
Write a name HelloWorldExample and click on "Add Folder" and you will see the project created with name "HelloWorldExample".
You can also observe the same in left side menu of Project Explorer. Now click on "HelloWorldExample" from the list of the projects and it will open the folder "HelloWorldExample" for you.
As we created previously, create three folders inside "HelloWorldExample" namely WSDL, Business Service and Proxy Service.
Your project explorer should look like this
Now, the steps to be followed are,
1) Import WSDL URL : This will be the concrete WSDL to BPEL service.
2) Create Business Service : For the time being this can be thought as service endpoint of Oracle ESB
3) Create Proxy Service : For the time being this can be thought as routing service of Oracle ESB
4) Test the Proxy Service : This is an ALSB Test Client like we have inovke option in BPEL PM.
1) Import WSDL : inside Project Explorer, click on WSDL and you will be inside WSDL folder. From the drop-down Create Resource, select option "Resource from URL".
In URL/path give the WSDL URL. Resource Name "WSHelloWorld" and Resource Type is "WSDL". Click "Next".
It will take you to the "Review Loaded Resources" screen and shows that one WSDL and related schema files are to be imported. Select all the resources and click "Import". The resources are imported in folder WSDL.
2) Create Business Service : inside Project Explorer, click on HelloWorldExample --> Business Service and you will be inside "Business Service" folder. From the drop-down Create Resource, select option "Business Service".
Give the name "BSHelloWorld". Select WSDL Web Service option and click on Browse, From the list of Web Service select "WSHelloWorld" which we created in Option 1.
The popup will come up, select port option as displayed in the screen below and click "Submit".
You are back to create Business Services Screen, Click Next and observce the "Endpoitn URI". Go to the last step and Save.
The Business Service is successfully created.
3) Create Proxy Service : The similar way select Proxy Service folder and select option "Proxy Service" from Create Resource drop-down. Give name "PSHelloWorld".
Similar to step 2, select WSDL and create the proxy service. Once Proxy service is created, go to the folder "Proxy Service" and click on the icon Edit Message Flow".
Now, from pop-up, goto Variable Structure --> body and select the input variable from request. Drag and drop it to the Text Area on the right.
Validate the Message Flow, Save the Stage Configuration. Save the Message Flow. You are back to the Proxy Service folder.
Now, in change Center, click on "Activate", give proper description of the change and submit. Now the changes; right form creation of the Project folder to the Message Flow are applied to the Server.
4) Test the proxy Service : Click on Spider icon in Actions given for Proxy Service.
If you are getting the following error screen, then I must say that you are on the right way.
This is due to the current inability for ALSB to handle the partnerlink element in the WSDLs generated by the Oracle stack.
<?xml version="1.0" encoding="UTF-8"?>
<definitions name="Helloworld" targetNamespace="http://xmlns.oracle.com/Helloworld" xmlns="http://schemas.xmlsoap.org/wsdl/"
......>
<service name="Helloworld">
<port name="HelloworldPort" binding="tns:HelloworldBinding">
<soap:address location="http://WWW-XXYYZZZ.corp.ABC.CO:8888/orabpel/default/Helloworld/1.0"/>
</port>
</service>
<plnk:partnerLinkType name="Helloworld">
<plnk:role name="HelloworldProvider">
<plnk:portType name="tns:Helloworld"/>
</plnk:role>
</plnk:partnerLinkType>
</definitions>
To sovle this issue, in change center, click on Create to create the new session, goto click on WSDL file in WSDL folder and edit the wsdl text as given below.
Change
<plnk:partnerLinkType name="Helloworld">
<plnk:role name="HelloworldProvider">
<plnk:portType name="tns:Helloworld"/>
</plnk:role>
</plnk:partnerLinkType>
with
<plnk:partnerLinkType name="Helloworld" xmlns:myTarget="http://xmlns.oracle.com/Helloworld">
<plnk:role name="HelloworldProvider">
<plnk:portType name="myTarget:Helloworld"/>
</plnk:role>
</plnk:partnerLinkType>
Activate the changes using Change center and test the proxy service.
That is all from my side. Drop a comment if you find it useful or if you are facing some issues with this implementation.
I'm thankful to Chris Tomkins who helped me to perform OSB(ALSB) adventure faster.
Cheers
Nirav


